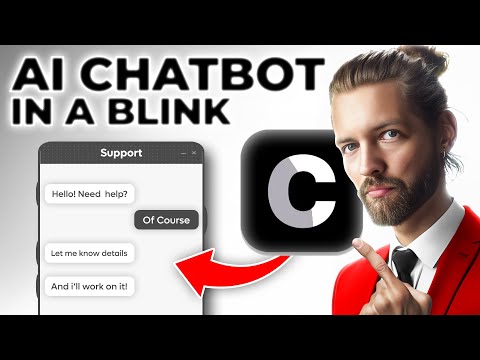
Elevate Your Website with Custom AI Chatbots: A Step-by-Step Guide
Elevate your website with a custom AI chatbot that answers customer queries, collects leads, and provides 24/7 personalized support. Follow this step-by-step guide to set up your chatbot in minutes, even without technical experience. Optimize for SEO, readability, and engagement.
February 21, 2025
Unlock the power of AI-driven customer engagement with a custom chatbot tailored to your website. Effortlessly answer customer queries, collect leads, and enhance the overall user experience - all without technical expertise. This step-by-step guide will show you how to create your own AI chatbot in minutes, transforming the way you connect with your audience.
Personalized AI Chatbot for Your Website
Easy Setup Process
Customize the Chatbot to Fit Your Brand
Integrating the Chatbot onto Your Website
Conclusion
Personalized AI Chatbot for Your Website
Personalized AI Chatbot for Your Website
Creating a personalized AI chatbot for your website is a powerful way to provide instant communication and personalized interactions for your customers. With ChatBase, you can easily set up a custom chatbot that is trained on your website's content, FAQs, and other data sources.
The process is straightforward:
- Connect your website's URL to ChatBase, and it will automatically crawl and fetch all the relevant content.
- Customize the chatbot's settings, including the system prompt, temperature, and initial messages, to align with your brand and customer experience.
- Embed the chatbot on your website, either through a WordPress plugin or by adding the provided code snippet to your website's headers or footers.
Once set up, the AI-powered chatbot can answer customer queries, provide product recommendations, and even collect leads - all while maintaining a personalized and on-brand interaction. The chatbot's performance can be monitored through the analytics dashboard, and you can further refine the responses by retraining the model as your website content evolves.
By leveraging the power of AI, you can provide 24/7 customer support and personalized interactions without the need for a large team of customer service representatives. This not only enhances the customer experience but also helps you streamline your operations and reduce costs.
Easy Setup Process
Easy Setup Process
The setup process for creating a custom AI chatbot on your website with Chatbase is straightforward and can be completed in just a few simple steps:
-
Connect Your Data Sources: Chatbase allows you to connect various data sources, including PDFs, documents, websites, Q&A, and even Notion, to train your language model and personalize the responses.
-
Fetch Website Links: By entering your website URL, Chatbase will automatically crawl and fetch all the relevant links, allowing your chatbot to be trained on the content of your entire website.
-
Create the Chatbot: With just a click, you can create your custom chatbot, which will be ready to start answering customer queries.
-
Customize the Chatbot: Chatbase provides a range of customization options, including the ability to adjust the chatbot's personality, set the temperature for more creative or consistent responses, and configure the chat interface to match your brand.
-
Embed on Your Website: You can easily integrate the chatbot onto your website, either by using the provided WordPress plugin or by simply copying and pasting the embed code into your website's header or footer.
The entire process is designed to be user-friendly and requires minimal technical expertise, allowing you to set up a personalized AI chatbot on your website in just a few minutes.
Customize the Chatbot to Fit Your Brand
Customize the Chatbot to Fit Your Brand
To customize the chatbot to fit your brand, you can follow these steps:
-
Adjust the AI Model and System Prompt: In the "AI" section, you can choose the AI model to use (GPT-4, GPT-4 Turbo, or GPT-3.5 Turbo) and customize the system prompt. The system prompt defines the chatbot's role and constraints, ensuring it maintains focus and provides responses aligned with your desired customer experience.
-
Personalize the Chat Interface: In the "Chat Interface" section, you can customize the initial message, suggested messages, message placeholder, footer, and theme. This allows you to align the chatbot's appearance and tone with your brand.
-
Set the Chatbot's Identity: Under the "Chat Interface" section, you can set the display name, profile picture, and chat icon to match your brand's visual identity. This helps the chatbot feel more personalized and integrated with your website.
-
Adjust Branding and Styling: You can further customize the chatbot's appearance by modifying the user message color, bubble color, and button color. This ensures the chatbot seamlessly blends with your website's design.
-
Secure the Chatbot: In the "Security" section, you can set the chatbot's visibility to "Public" to allow customers to interact with it. You can also configure allowed domains to ensure the chatbot is only accessible on your website.
-
Integrate Lead Generation: The "Leads" section allows you to capture customer information, such as email or phone number, during the chat conversation. This can be valuable for building your email list and following up with interested customers.
-
Enable Notifications and Webhooks: In the "Notifications" and "Webhooks" sections, you can set up email alerts for new leads or conversations, as well as integrate the chatbot with other tools and platforms through webhooks.
-
Utilize Custom Domains: The "Custom Domains" section allows you to use your own domain (e.g., chat.yourwebsite.com) for the chatbot, further reinforcing your brand identity.
By following these steps, you can create a chatbot that seamlessly integrates with your website and brand, providing a personalized and engaging customer experience.
Integrating the Chatbot onto Your Website
Integrating the Chatbot onto Your Website
To integrate the chatbot onto your website, you have two options:
-
WordPress Plugin Integration:
- Go to the WordPress admin dashboard and add a new plugin.
- Search for "Chatbase" and install the plugin.
- Activate the plugin and navigate to the Chatbase options.
- Enter your chatbot ID, which you can find in the Chatbase platform settings.
- Set the visibility to "Public" and save the changes.
- The chatbot will now be embedded on your WordPress website.
-
Manual Embed Code Integration:
- In the Chatbase platform, click on the "Connect" button and select the "Embed" option.
- Copy the provided embed code, either the iframe or the script.
- If using the iframe, you can directly paste the code where you want the chatbot to appear on your website.
- If using the script, you can add it to the header or footer of your website, depending on your website's setup.
- Save the changes, and the chatbot will be integrated onto your website.
Regardless of the method you choose, make sure to set the visibility to "Public" in the Chatbase platform settings to allow your customers to interact with the chatbot.
Conclusion
Conclusion
In this video, we've learned how to create a customized AI chatbot for your website using Chatbase. The key steps include:
- Connecting your website data sources to train the chatbot on your specific content and FAQs.
- Customizing the chatbot's appearance, initial messages, and lead generation form to match your brand.
- Embedding the chatbot on your website, either through a WordPress plugin or by adding the provided code snippet.
The result is an AI-powered assistant that can provide 24/7 support, answer customer queries, and collect leads - all without the need for a large customer service team. Chatbase makes it easy to set up and maintain this powerful tool, helping you deliver a better experience for your website visitors.
Whether you have a WordPress site or another platform, the process is straightforward, and the benefits are clear. By implementing a Chatbase chatbot, you can improve customer satisfaction, increase conversions, and streamline your operations - all while strengthening your brand's online presence.
FAQ
FAQ

